BMX Braking: U-brake and rotor


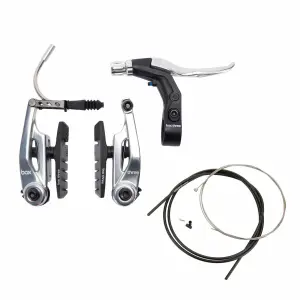


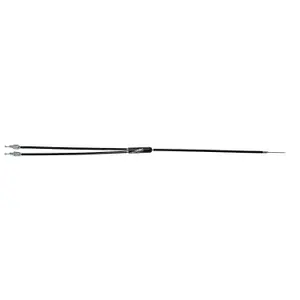


The BMX braking system consists of a few essential parts: U or V brakes, levers, rotors, cables and housing, with references like the Odyssey Gyro rotor cable. This page helps to restore the rear brake of a racing bike, install a rotor for barspins in freestyle, or find a specific lever and a cable that slides smoothly without snagging.
A well-adjusted rear brake, for both the track and the skatepark.
U-brake or V-brake: which brake for which BMX
The U-brake, mounted under the chainstays or on the frame's rear dropouts, is the brake for freestyle: compact, it doesn't stick out on the sides and leaves space for pegs and grinds. Its two arms pivot on bolts screwed to the frame and are balanced by spring tension screws. The V-brake, more powerful thanks to its long arms, is mainly used on race bikes, where it stops the rider at the bottom of the track.
In races, a working rear brake is required by the rules, and most riders are satisfied with this single brake.
The Gyro rotor and barspins
The rotor, often referred to as Gyro after the model name from Odyssey, allows the handlebars to make complete turns without twisting the brake cable. The main cable goes to a splitter, then divides into two: an upper cable connects to the top ring of the rotor, and a lower cable connects to the bottom ring, joined by a bearing around the fork pivot. When the handlebars turn, the ring follows, and the cable doesn't twist.
The upper Odyssey Gyro cable of 425 millimeters should be replaced as soon as it frays. The adjustment requires equal tension on both cables; otherwise, the ring will become misaligned, and the brake will stick.
Lever, cable and casing: precision at the handlebars
The BMX lever, short and often designed for two fingers, is adjusted to fall under the index and middle fingers without letting go of the grip. Positioned on the left or right depending on the rider’s preference, it controls a cable that should slide freely. The casings are cut cleanly, with end caps put back in place, to avoid crushing the spiral and weighing down the feel.
A brake cable that is lightly greased inside the casing slides better, especially after a session in the rain. A casing that is bent too tightly at the frame crossing stiffens the lever: it should maintain a gentle curve.
The selection
Braking is organised by part:
The BMX is complemented by bikes, wheels and tyres, transmission, components, equipment, on the BMX page.
Brakeless or braked: choose according to your practice
Many street riders remove their brake and ride brakeless: the bike gets lighter, the frame loses its mounts, and the rider slows down by sliding their foot on the rear tyre. This practice assumes good mastery of the bike and spots closed to traffic.
On public roads, the Highway Code requires two brakes on any bike. To learn tricks at the skatepark, a rear brake remains a real safety net, especially to stop the wheel at the top of a curve and maintain balance before going back down.
Frequently Asked Questions
How to adjust a BMX U-brake?
First, adjust the brake pads so they hit the rim flat, about one or two millimeters apart. Then balance the two arms with the spring tension screws, and finally adjust the cable tension at the lever.
How to install a rotor on a BMX?
You need a frame and fork designed to accept it, with appropriate cable routing. Mount the ring around the pivot below the stem, attach the upper and lower cables, and then equalise their tension before tightening.
Why does my BMX brake stay stuck to the rim?
A spring that is too weak on one side, a cable that rubs in a dirty casing, or a rotor poorly balanced can prevent the arms from returning. Clean and grease the cable, then adjust the spring tensions.
Which pads to choose for a BMX brake?
Brake pads are chosen based on the caliper and rim: a soft rubber bites hard on aluminium but wears quickly, while a harder rubber lasts longer. They should be replaced as soon as the grooves disappear from their surface.
Is a specific lever needed for a BMX?
Yes, BMX levers are designed for a 22.2-millimetre handlebar and short cable pull, suited for U-brakes. A mountain bike V-brake lever, with a long pull, makes the braking of a U-brake imprecise and weak.